It started with a trip to Goodwill, which resulted in a fabulous piece of fabric for very reasonable. $3 was a steal, and imagine my delight when I got to the till and all linens/materials were 50% off. Yup, $1.50.


I casually mentioned the plans that were starting to take shape to Henry, and explained that there might be some cost involved in the way of plywood. At this point I had decided on a budget of $50 for the whole shabang. Henry mentioned that there happened to be two pieces at work that were being discarded and that he was sure we could have them. FOR FREE! I love free.
We had to fasten the two pieces together and we were a little short. Remember our *free* filing cabinets? They came with a whole stack of wood that the previous owners had used to mount the desk area to the wall. It required a little fitting, but we ended up with more than enough for what we needed.


We measured and put screws evenly over the entire span of wood for stability, making a grid of sorts. Honestly, look at that sheepish grin. I love him.


So, now we had a structure but nothing to cushion with. I mentioned this to my sister in law, saying something like "I don't think there's any way around the fact that I'm going to have to spend money on upholstery foam. I should probably look into how much it really is". I kid you not...driving to her house not two days later, there, on the curb was two stacks of upholstery foam. Neatly, TIED WITH A BOW! What?! A gift...just for me! I could not believe it!! I slammed on my squeaky brakes and I stuffed that foam in my van like I was some sort of thief. I was feeling like one at this point.
Hi, my name is Stacey and I am a trash picker. Yeah, you heard me the first time. Trash. Picker.

For the record, I DID stop to inspect it and smell it. It was clean. This trash picker only picks clean trash. I learned that lesson after taking home a cupboard that positively REEKS. It's been in my shed for over a month and still smells. Blech. Back to the bed...
We measured the desired length and cut accordingly. We then cut the bottom portion of the plywood to form the legs, and primed and painted them. They are mostly hidden by curtains, but we painted them the same color of the wall so they'll blend a little better.
Next up ~ the foam. We started with a spray adhesive but it was pretty clear it wasn't going to cut it. We ended up using a floor adhesive which worked like a charm.


Once we realized that the center sections were going to compress in too much, my brilliant husband decided to fill the middle with ceiling tiles, leftover from our downstairs bathroom ceiling. They worked amazing...and we felt good having used up allll that tile (who likes seeing stuff like that going to waste? Not us).

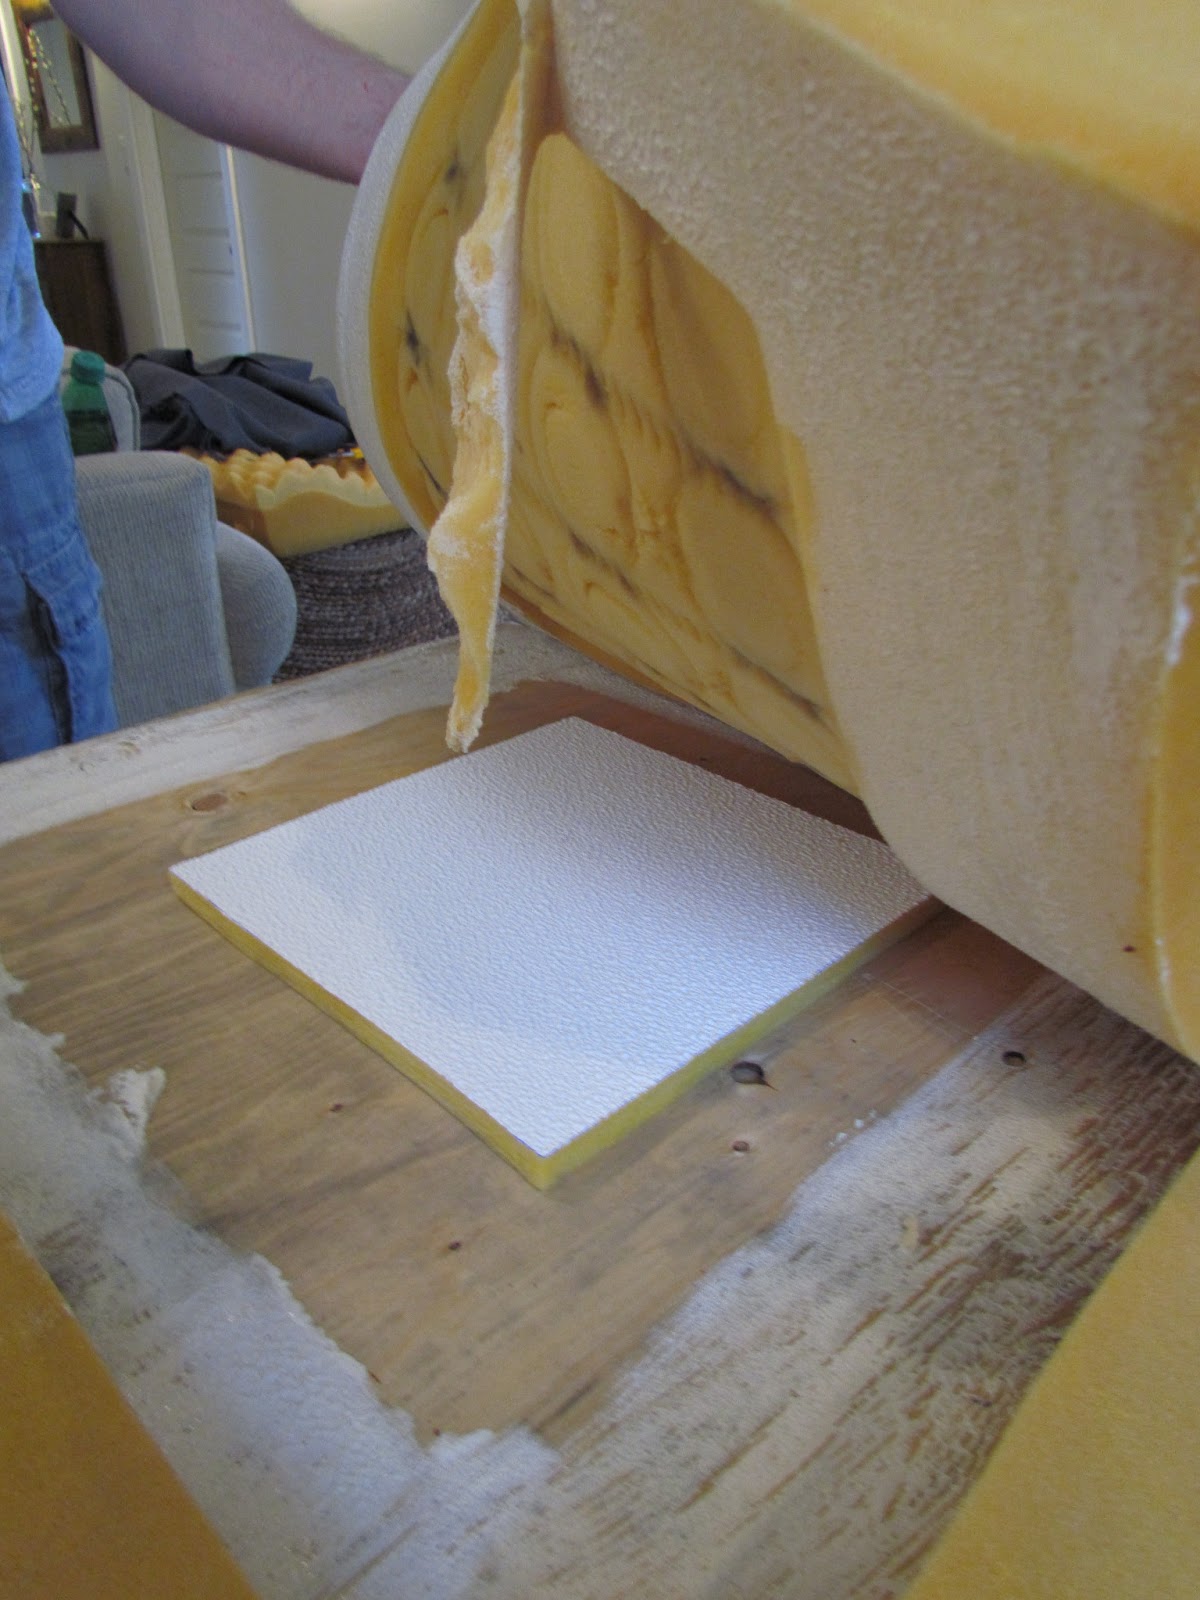
After applying the foam, we covered it with a stiffer, plastic-y foam for a more solid surface.

And while we waited for the adhesive to set.......a little ironing and wood blind installation action. Exciting stuff. I know, not really but someone's gotta do it.


Aaaand, it was ready for material. The fun part :) Lots of debating, pulling, stapling, irritation and more stapling.


Is it just me, or are my husband's arms ridiculously strong looking? Phew...it just got hotter in here. Yes, definitely hotter in here.


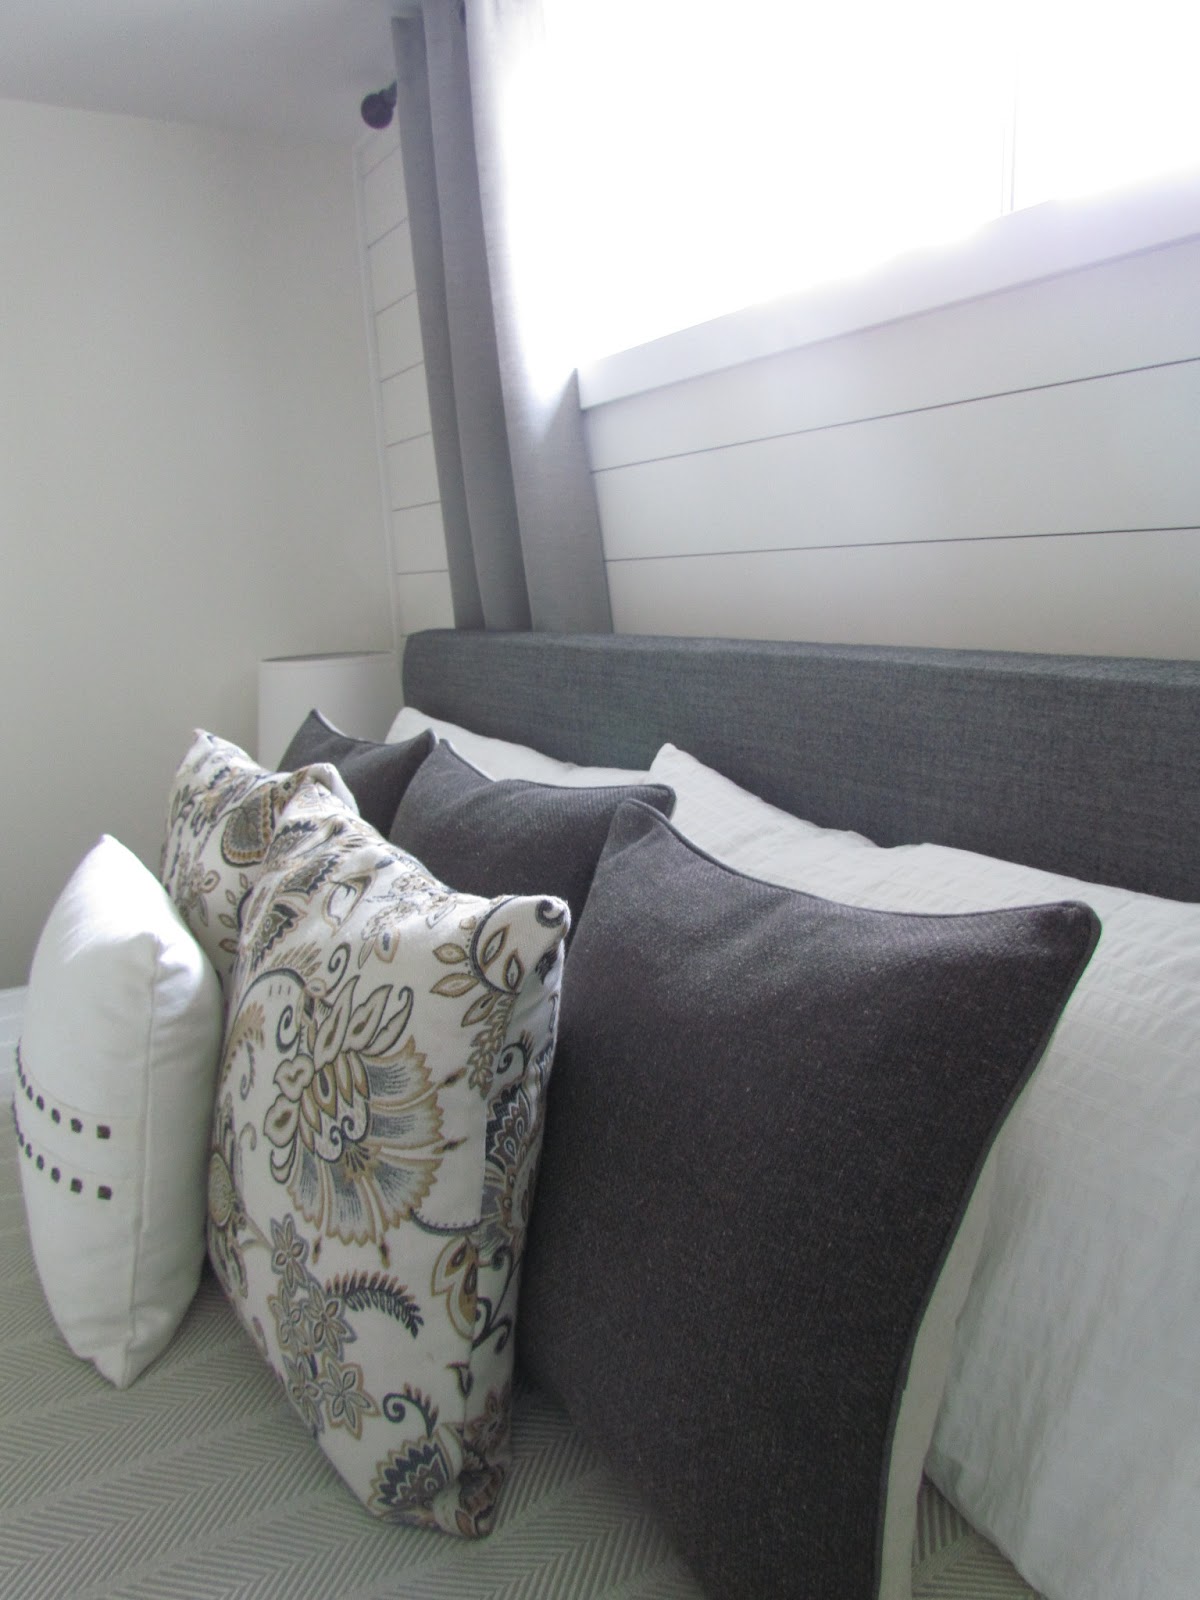
Next? Bolts. Then? Finished. And? I fell in love. (Yes, that is my bedroom floor. EWW)


Before:

After:
 | ||


Grand total for this project:
Fabric: $1.50
Plywood: free (Henry's work donation)
Foam pieces: free (curbside freebie)
Adhesive: $0 (already owned)
Screws and adhesive tool: $6.76
Bolts: $2.73
Total: $10.99
Haha! Stacey! I totally get the arm thing. It's one of my favourite parts of watching Ben work :-)
ReplyDeleteGreat job, on the headboard; it looks great!