A little reading I did today....
http://www.paultripp.com/articles/posts/laying-down-the-law
Wednesday, 24 July 2013
Sunday, 14 July 2013
You made your bed, you can lay in it!!
With pleasure, I say! We tackled our DIY headboard this weekend. Mostly because I didn't feel like having the hulking thing laying around in our family room :)
It started with a trip to Goodwill, which resulted in a fabulous piece of fabric for very reasonable. $3 was a steal, and imagine my delight when I got to the till and all linens/materials were 50% off. Yup, $1.50.


I casually mentioned the plans that were starting to take shape to Henry, and explained that there might be some cost involved in the way of plywood. At this point I had decided on a budget of $50 for the whole shabang. Henry mentioned that there happened to be two pieces at work that were being discarded and that he was sure we could have them. FOR FREE! I love free.
We had to fasten the two pieces together and we were a little short. Remember our *free* filing cabinets? They came with a whole stack of wood that the previous owners had used to mount the desk area to the wall. It required a little fitting, but we ended up with more than enough for what we needed.


So, now we had a structure but nothing to cushion with. I mentioned this to my sister in law, saying something like "I don't think there's any way around the fact that I'm going to have to spend money on upholstery foam. I should probably look into how much it really is". I kid you not...driving to her house not two days later, there, on the curb was two stacks of upholstery foam. Neatly, TIED WITH A BOW! What?! A gift...just for me! I could not believe it!! I slammed on my squeaky brakes and I stuffed that foam in my van like I was some sort of thief. I was feeling like one at this point.

For the record, I DID stop to inspect it and smell it. It was clean. This trash picker only picks clean trash. I learned that lesson after taking home a cupboard that positively REEKS. It's been in my shed for over a month and still smells. Blech. Back to the bed...
We measured the desired length and cut accordingly. We then cut the bottom portion of the plywood to form the legs, and primed and painted them. They are mostly hidden by curtains, but we painted them the same color of the wall so they'll blend a little better.
Next up ~ the foam. We started with a spray adhesive but it was pretty clear it wasn't going to cut it. We ended up using a floor adhesive which worked like a charm.


Once we realized that the center sections were going to compress in too much, my brilliant husband decided to fill the middle with ceiling tiles, leftover from our downstairs bathroom ceiling. They worked amazing...and we felt good having used up allll that tile (who likes seeing stuff like that going to waste? Not us).


Is it just me, or are my husband's arms ridiculously strong looking? Phew...it just got hotter in here. Yes, definitely hotter in here.


The fun part is that if at any time we feel like switching up the look, we can buy different fabric and either have a slip cover made for it or just staple over the current material. You know, in case we want a Christmas, fall, or Canada Day themed headboard.....
It started with a trip to Goodwill, which resulted in a fabulous piece of fabric for very reasonable. $3 was a steal, and imagine my delight when I got to the till and all linens/materials were 50% off. Yup, $1.50.


I casually mentioned the plans that were starting to take shape to Henry, and explained that there might be some cost involved in the way of plywood. At this point I had decided on a budget of $50 for the whole shabang. Henry mentioned that there happened to be two pieces at work that were being discarded and that he was sure we could have them. FOR FREE! I love free.
We had to fasten the two pieces together and we were a little short. Remember our *free* filing cabinets? They came with a whole stack of wood that the previous owners had used to mount the desk area to the wall. It required a little fitting, but we ended up with more than enough for what we needed.


We measured and put screws evenly over the entire span of wood for stability, making a grid of sorts. Honestly, look at that sheepish grin. I love him.


So, now we had a structure but nothing to cushion with. I mentioned this to my sister in law, saying something like "I don't think there's any way around the fact that I'm going to have to spend money on upholstery foam. I should probably look into how much it really is". I kid you not...driving to her house not two days later, there, on the curb was two stacks of upholstery foam. Neatly, TIED WITH A BOW! What?! A gift...just for me! I could not believe it!! I slammed on my squeaky brakes and I stuffed that foam in my van like I was some sort of thief. I was feeling like one at this point.
Hi, my name is Stacey and I am a trash picker. Yeah, you heard me the first time. Trash. Picker.

For the record, I DID stop to inspect it and smell it. It was clean. This trash picker only picks clean trash. I learned that lesson after taking home a cupboard that positively REEKS. It's been in my shed for over a month and still smells. Blech. Back to the bed...
We measured the desired length and cut accordingly. We then cut the bottom portion of the plywood to form the legs, and primed and painted them. They are mostly hidden by curtains, but we painted them the same color of the wall so they'll blend a little better.
Next up ~ the foam. We started with a spray adhesive but it was pretty clear it wasn't going to cut it. We ended up using a floor adhesive which worked like a charm.


Once we realized that the center sections were going to compress in too much, my brilliant husband decided to fill the middle with ceiling tiles, leftover from our downstairs bathroom ceiling. They worked amazing...and we felt good having used up allll that tile (who likes seeing stuff like that going to waste? Not us).

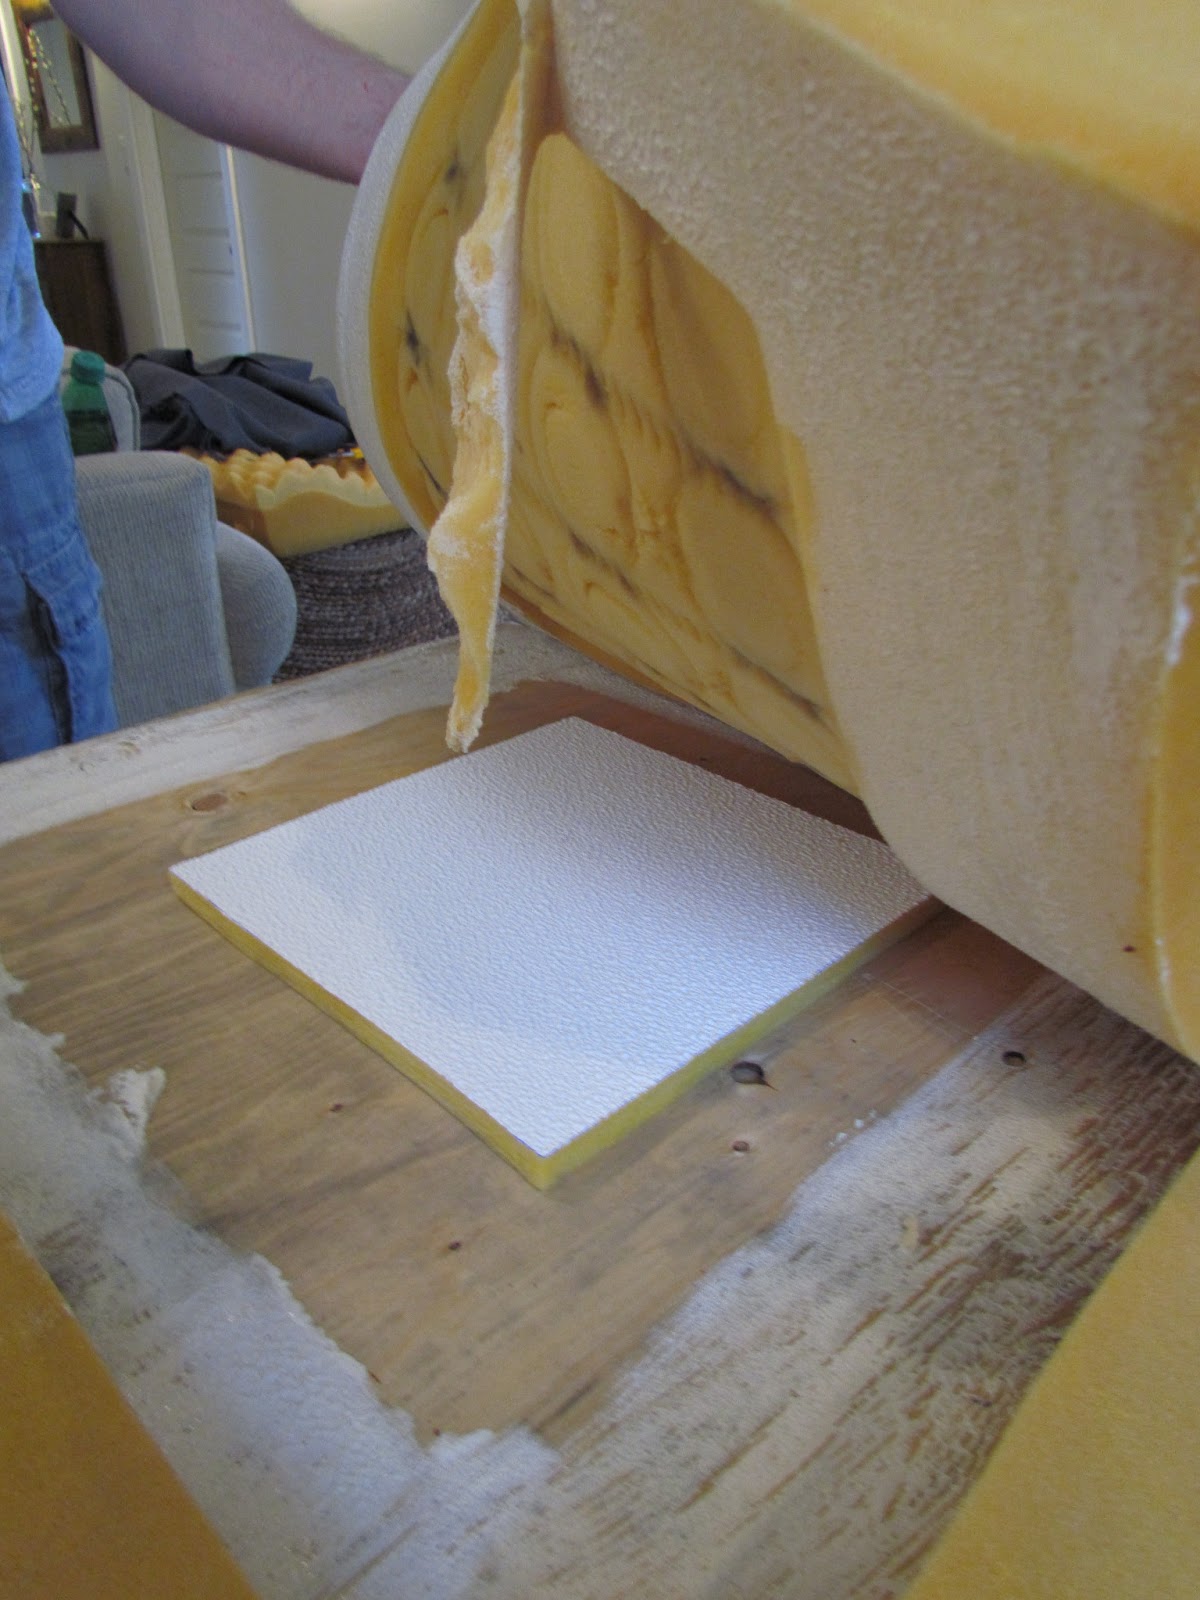
After applying the foam, we covered it with a stiffer, plastic-y foam for a more solid surface.

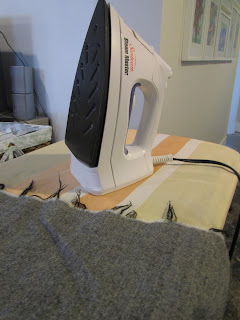
And while we waited for the adhesive to set.......a little ironing and wood blind installation action. Exciting stuff. I know, not really but someone's gotta do it.


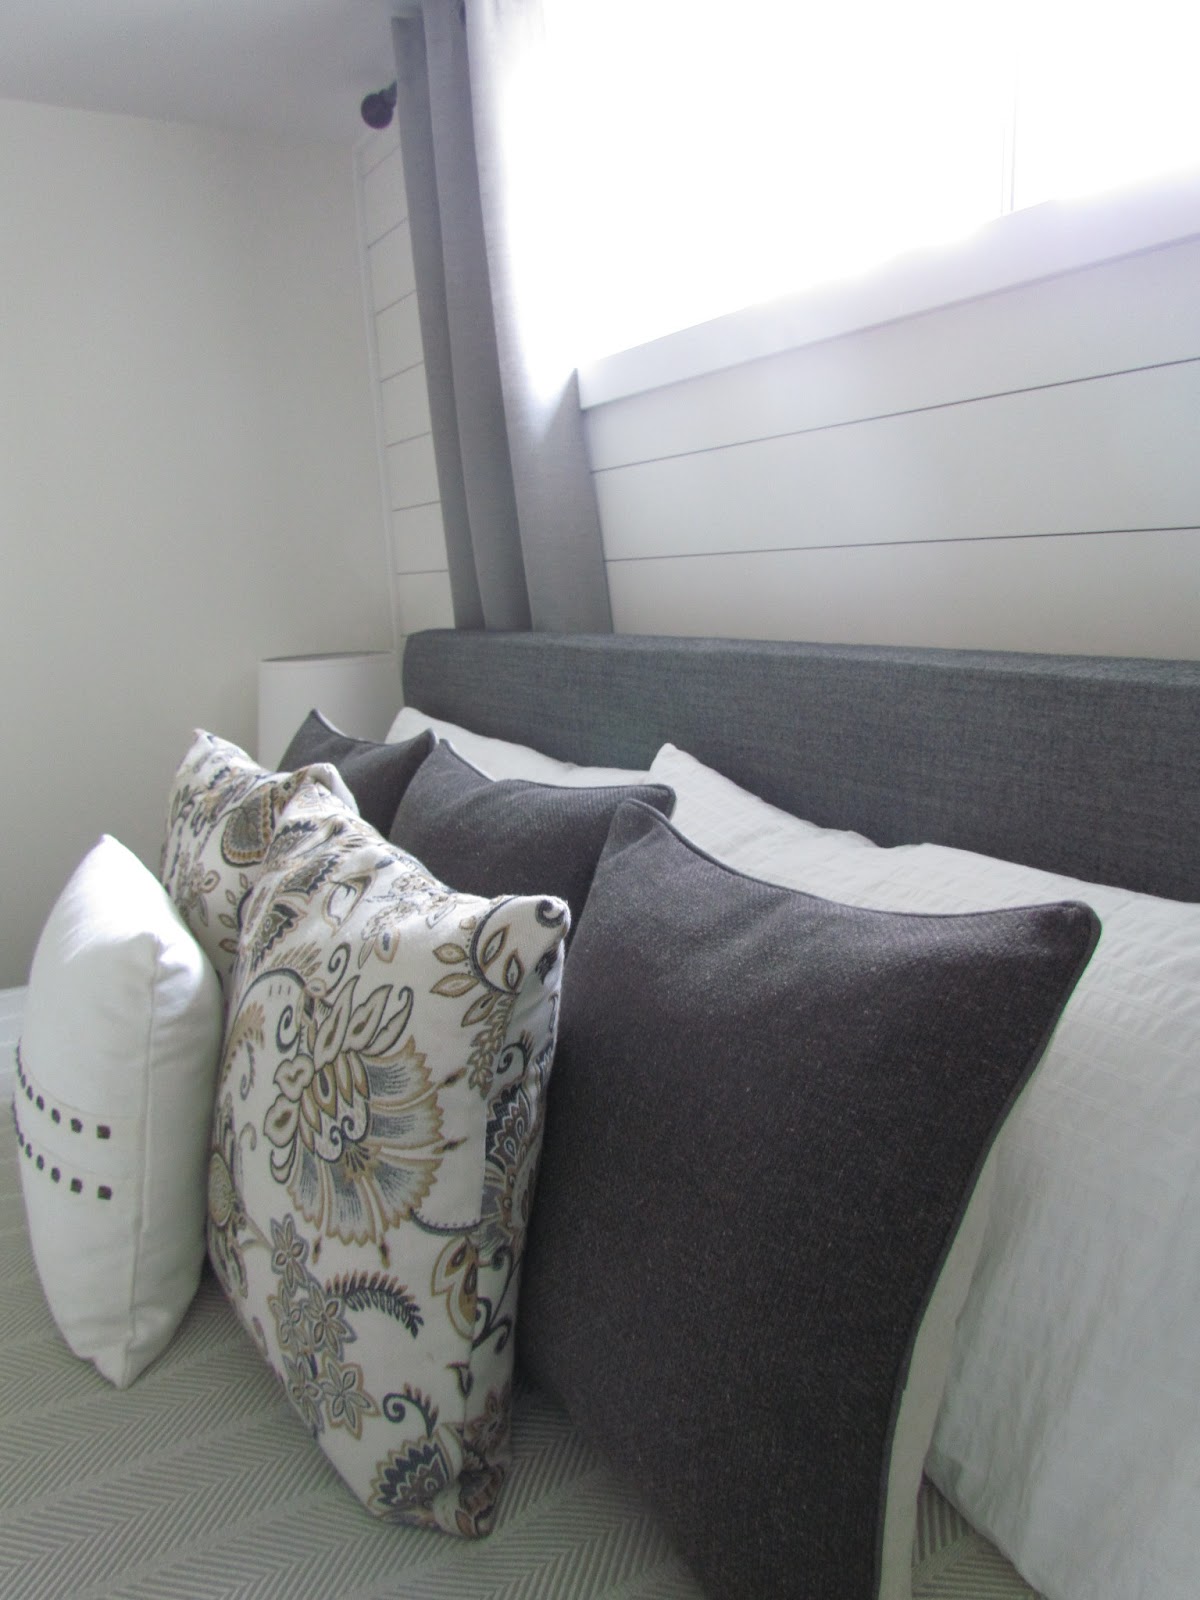
Aaaand, it was ready for material. The fun part :) Lots of debating, pulling, stapling, irritation and more stapling.


Is it just me, or are my husband's arms ridiculously strong looking? Phew...it just got hotter in here. Yes, definitely hotter in here.


Next? Bolts. Then? Finished. And? I fell in love. (Yes, that is my bedroom floor. EWW)


Before:

After:
 | ||


Grand total for this project:
Fabric: $1.50
Plywood: free (Henry's work donation)
Foam pieces: free (curbside freebie)
Adhesive: $0 (already owned)
Screws and adhesive tool: $6.76
Bolts: $2.73
Total: $10.99
Tuesday, 9 July 2013
A smile and a sneak
I've been feeling a little rough since last Thursday. Two abscessed teeth I'm on antibiotics for(which has meant a fair amount of Tylenol for me, which has meant some discomfort because my body doesn't tolerate Tylenol all that well thanks to a gall bladder fiasco a few years ago), combined with flu like symptoms..think the sweats, clammy, cold feeling. Body aches, a horrid headache thanks to aspartame detox(I figured since I had abscessed teeth to deal with, why not quit my diet pop addiction cold turkey at the same time....a genius, I am not). And this morning...an upset, cranky stomach.
Ok. I'm done whining now :) Truthfully, I am on the upswing. I think. Anyways....Henry came home with flowers today...he said he thought I might need some cheering up. He was right...and it worked :)
I figured I would put them in our downstairs bath...giving you a sneak peek at another room we are verrry close to being done :)
And now, I'm going to go floss.


Cheers to husbands who make you smile :)
Sunday, 7 July 2013
Done!
Remember this little yard sale find that I was working on?


Yeah, I finished it. I started this project with excitement, thinking "I'm going to loooove this project". I didn't. It was a pain in the neck to strip and sat there, dejectedly for a while. I would walk by it and think "Oh yeah, I should work on that ugly thing". But I didn't...I would just keep walking around it, ignoring it.
After I was sick of stepping around it and having the drawers sent flying by our adventurous cat (and having noticed that I have a ridiculous amount of projects piling up), I decided to just finish it. After the paint had been stripped off, it was very clear that this wasn't a great piece of furniture. While I knew that when I bought it, I didn't think it would be that bad. The plywood is garbage. It had an orange undertone that no amount of hand numbing sanding would get rid of. And believe me, I TRIED. My little sander got a workout...and my hand was numb and tingly for a long time after :) I thought about painting it to avoid seeing that horrid undertone, but when I bought it, I had my heart set on staining it and figured I would try that first. If it was awful, then I'd get out the paint.


I used my Minwax (dark walnut) stain, which I already had used on several projects ~ my bathroom vanity and a dresser top ~ and loved. Ladies and gents....this sucker soaked up stain like I've never seen before. I felt like I had no control over it. I've stained before and have always had lots of time to wipe off excess stain. There was no wiping this time. I would wipe on the smallest amount and seconds later it was gone...it was HUNGRY. It was blotchy. I was frustrated but again, thought "Stacey, you started it. Just finish the stupid thing".

I finished staining the wretched thing and went to clean up. Then this weird thing happened. I came back to set it in a place it could dry, out of the way....and as I came downstairs and saw it, I thought "Hey, I don't think it's that bad". It reminded me of one of those rustic pieces you see in Homesense. Henry came in and said "Wow, I love it".
And so it went from being this awful, thorn-in-my-side-I'm-going-to-set-this-thing-at-the-curb project, to being a wow,-I-love-this-piece-I'm-so-glad-it-turned-out-nothing-like-I-planned project. Don't you just love those?
I decided on Antique Brass drawer pulls and I think they are perfect with the finish and blend nicely.
Final tally:
Dresser: $5
Stain: $0 (already owned)
Pulls: $26.95
Total: $31.95


Since it sits outside the bathroom door (and we don't have tonnes of bathroom storage), it will hold extra shampoo, conditioner, hair elastics etc..... Many thanks to the Holder family (a daycare family who I had to say goodbye to after 3 1/2 years) for the gift card to Homesense ~ do they KNOW me or what! I bought that beautiful butcher block mirror and it goes wonderfully with the little cabinet and ties into the butcher block desk on the other end of the family room (another project we'll be tackling soon!).


I love this pencil sketch of the world/hands by my talented niece Shelby :)

Here, you can see where the original pulls sat. The new ones cover it nicely and so I didn't bother to fill them in.


And here's a peak into the master bedroom, which is oh-so-close-to-being-done. I'll be working on making a headboard this week...more on that soon!
So, what do you think? A hit or a miss?
Wednesday, 3 July 2013

Subscribe to:
Posts (Atom)