Tuesday 17 December 2013

Desk progress


Do you recall our desk dilemma?

Well, we've been working on said desk area and I've got some progress to show you.  The area is evolving as time and money allows and overall we love this space.  I do our family paperwork here, the kids watch ridiculous youtube videos  do homework here, Reeve LOVES to color here and it's also a great workspace for puzzling.  Yup, it's a great space.

Once we had our beautiful desk top, I set about to find some filing cabinets.  I ended up scoring some for FREE off of Kijiji.  The catch was that we had to pick it all up.  And when I say all, I mean all 20+ pieces of a desk set up.  Huge countertops, lumber, cabinets etc...  There was a lot, but after a 1/2 hour of sweating and lugging it all out of a deep basement we had our 3 free filing cabinets and Goodwill had all of the extras.  I gave the cabinets a couple coats of Annie Sloan French Linen chalk paint and they're perfect.

We ended up ordering a large 8 foot glass piece to sit on top of the butcher block.  We wanted the kids to be able to draw, color and just USE the desk without fear of marker-ing up the wood and gauging it.  It was pricey at $226, but we are so glad we went ahead with it.  Since we used our yard sale profits for the entire cost of the counter top, and the cabinets were free....we didn't think it was unreasonable to spend the money to protect it.

Eventually we'd like to add some shelves on either sides of the window, however I suffer from a disease called "I need everything done yesterday" and it hasn't always worked out so well for me.  I've been known to change my mind....often.  SO, I'm intentionally NOT putting shelves up until I am absolutely, 99% sure that I will love them.  I've bought them.  I hold them up.  I ask Henry to hold them up.  Occasionally I ask my kids to hold them up.  But, I haven't hung them up yet. My patient husband is wondering what on earth has happened to his wife.  Progress people, progress!!

For now, here some glimpses of our desk space decorated with a little Christmas love.


 I love getting Christmas cards.  And photos.  I've just never had a good idea for displaying and storing them.  Until this year!  On so many blogs, I've seen people use simple baskets and bins to simply corral them and then set them out for people to enjoy.  I'm not sure why I didn't think of this before really, because it is so simple.  I've always imagined them being strung up somehow, but the clutter of that drove me crazy.  I dug out this cute basket (which I had initially bought at Goodwill for $1 and wanted to use for storing my eggs in the fridge ~ how cute would that be, thank you Pinterest)  Except my kids handle the eggs, and well...they are better off in their little carton.  I used some gold ribbon from my craft cabinet and wove it through.  After snipping some cedar branches off my tree in the backyard, I'd say it's a pretty little card basket that cost me virtually nothing!


 I'm really hoping to get around to organizing those filing cabinet drawers over the Christmas holiday break.  All of our desk contents are still in storage in the laundry room and we'd love to start getting some order back to more spaces.


Tuesday 26 November 2013

Clean up!

Every year we set aside an entire Saturday to do our "fall clean up and get ready for winter" chores.  Good times.  For real.  We love this day.  It's a great day of working together for the purpose of removing all evidence of summer and fall living.  We clean out our flowerbeds, throw out the pumpkins and mums, cut the grass one last time and then pack the shed full to the rafters with all our patio furniture, planters, bikes, fishing rods (always a little sad to pack those away), scooters etc...making sure the snow shovels and sleds are within easy reach for the coming winter.  Then, if you're me you take a moment to think about how amazingly awesome it will be to open those shed doors in a mere 6 months and unpack all that goodness again :)  I do enjoy the winter months and all of its own coziness, but spring really gets me going and I always look forward to UNpacking that shed more than I do packing it.

This years clean up day was a beauty.  Sunny blue skies, warm but cool enough temps to give a rosy glow to those kids' charming faces :)  Quite sure those kids fell into bed that night.


Yup.  That giant mess is(was) the back yard.  We took the trampoline down and it went to be enjoyed by some of our friends.  The topper on our playfort (which is now on the ground, on the right) had a nice canvas top on it that blew apart this year.  Considering we bought it in 2003, we couldn't complain.  It's been in direct weather for 10 years and has had a lot of children playing under it.  Now that our own kids are older and my daycare summers are numbered, we've decided to do away with the playfort and replace it with a ...... pool!  Perhaps next summer, although more likely the summer after.  Fun, fun!


 And see those curling shingles on that roof?  Yup, those need to be replaced next spring.  Our spring list is growing quickly!


Tanner decided to get comfy while trimming down the grasses :)  Henry laid some bricks for a pad of sorts under the water tap in an effort to keep it from turning into the muddy mess it was the past few summers.


Cuties :)  They worked hard, collected their well deserved hot chocolate at the end of the day and chatted about when we would be needing our sleds and snow shovels.  Turns out they didn't have long to wait.  3 short weeks later, and we're under at least 30" of snow!!


Friday 8 November 2013

Done at last!! (mostly)

Big day, folks.  Our master bedroom is done.  It still might need a few tweaks, but those will come as they come.  I feel like it's done enough to share, and I'm excited.  My apologies for not so great photos.  I hit something on my camera, and I can't figure out how to fix it...and so they are a little fuzzy.

What did we do in this little master bedroom?  We gutted the existing room, waterproofed it, updated and ran new electrical, knocked out a concrete wall, built a walk in closet, insulated, drywalled, taped and mudded, sanded, primed, painted, installed a plank wall, installed a bigger window, hung new doors, and had brand new carpet laid.  Then we installed a custom made blind, found a bed we loved, bought night tables, put together bedding and carved out a little desk space.  PHEW.

Anyways - more photos, less chatting....here we go!

Waterproofing.


 This is the wall that we ended up removing to make room for the closet.  This picture is taken from the middle of the family room.  We did end up losing some room in the family room, but it's hardly noticeable.


The wall was not load bearing, and it came down very quickly.  You can also see in this picture how off centered that bedroom window was.


Again...the window being removed to make way for the larger one.  This made the space on either side of the window in the room, the same.  Very pleasing to this symmetrical loving gal.


On the right, the beginnings of the closet which we later changed to have two doors in the center as opposed to one door at the end of the wall.  On the left, Dad working on wiring in the bedside light switches (note:  if you ever have the opportunity to install a switch that will turn off your main light without having to get of bed...DO IT.  It's awesome.).


And this is how our bedroom stayed for a.long.time.  We used our wrapping paper storage box and our Christmas storage totes as night tables :)  Our sheets were often damp and gross because of all the exposed concrete in the basement. 


Then it went to this....insulation and the mattress off the ground.

And then to this.


And after a WHOLE LOT of sweat and tears....to this.


Somebody send me to my room.  Please.


We worked hard to make it "us" and we are SO happy with the results.  It is a relaxing and cozy space :)  We are still working on the closet in terms of organizing and making it as functional as possible, so I'll update with that another day.  For now....we are happy to call one room "DONE".

Monday 4 November 2013

Packed away the pumpkins...

...and broke out a little Christmas decor :)  While it may still be a while before we set up our Christmas tree and string up our outdoor lights, I spotted my berry wreath while packing away all things pumpkin, and couldn't resist hanging it up :)  I may just have to look up my front door wreath....

Happy.


Thursday 31 October 2013

Bathroom Reno Part I

Friends, I have exciting news.  I *
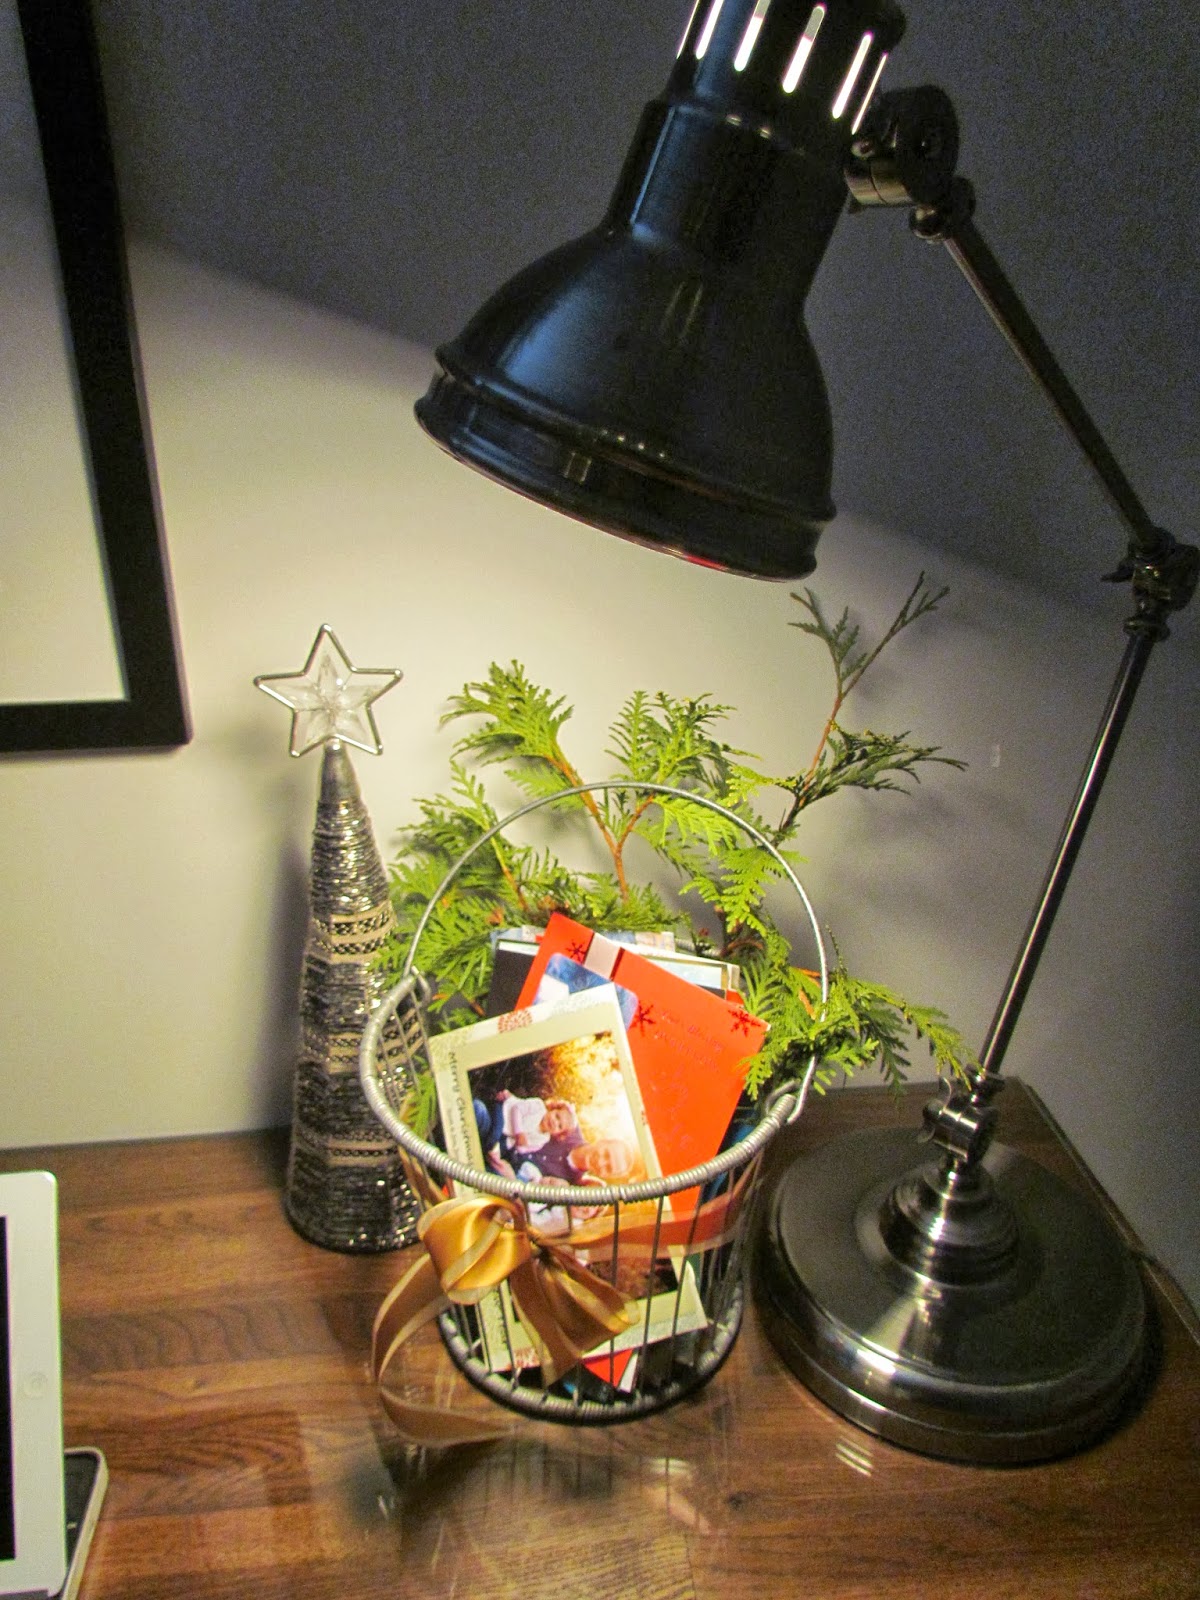
think* I may have decided on the final plan for our bathroom reno.  I don't know about you, but I find bathrooms extremely difficult to decorate.  I LOVED picking out our beautiful tub unit, shiny new toilet and sparkling white sink.  I LOVED picking out our marble floor tiles.  I didn't even mind picking out paint colors.  But decorating it?  The stuff on the walls?  I despise shower curtains, I detest towel bars/rods/hooks...anyway they come, I detest them.  I don't like bath mats ~ they just gross.me.out.  I don't like clutter, but you need to have soap, towels, etc...  Then you need art of some sort.  Tell me, what kind of art do you put in your bathroom?  It's just a weird thing.  Weird.ness.

This bathroom has gone through several stages and has been tweaked considerably already.  I'm not going to stop until I'm happy with it.  I think I'm on the right road, and that's no small miracle.  Of course, it could all be switched out tomorrow but I doubt it.  I think.

How about we start with it's humble beginnings?  Here we are:

We flooded.  Remember that?  This was the waterproofing being done.  Grossness. Can you believe we still used the shower during this process?!


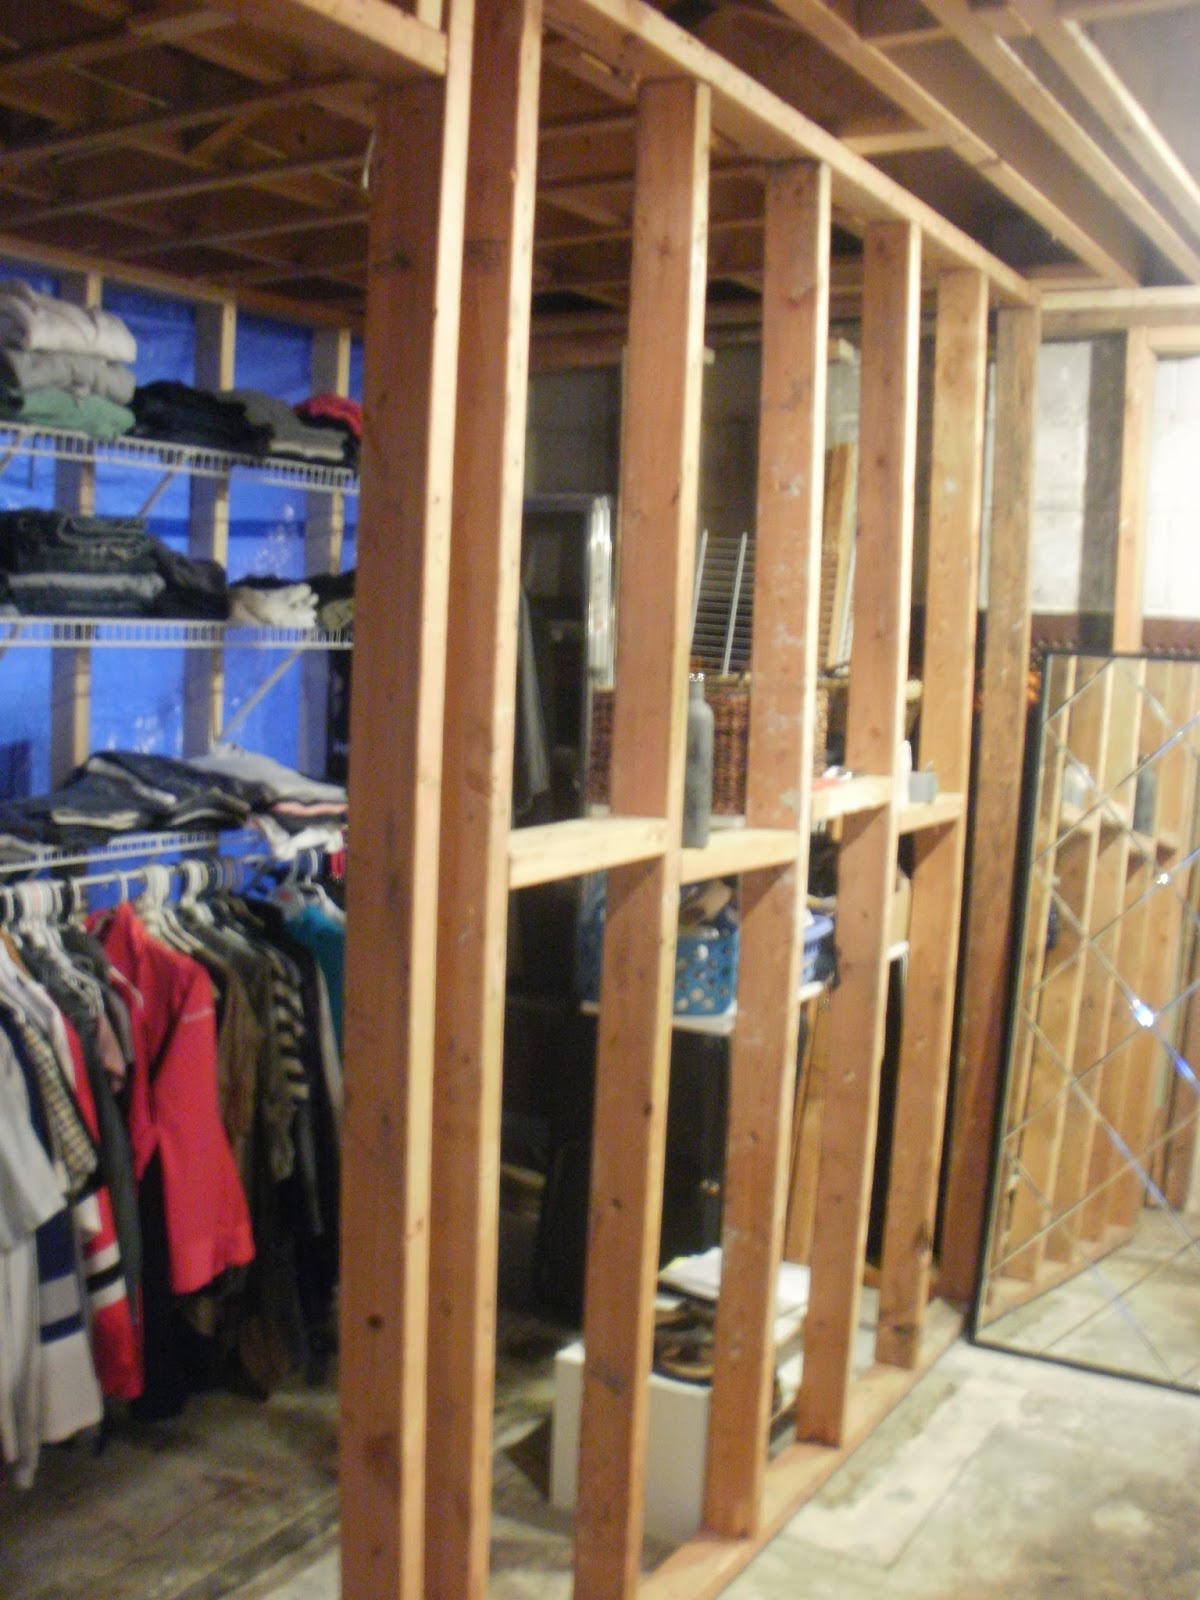
Yup.  There's the shower curtain ~ good old blue tarps were used everywhere down there.  That hole to the left of the photo is where the toilet sat.  We showered like this for a couple of months.


It gets better.

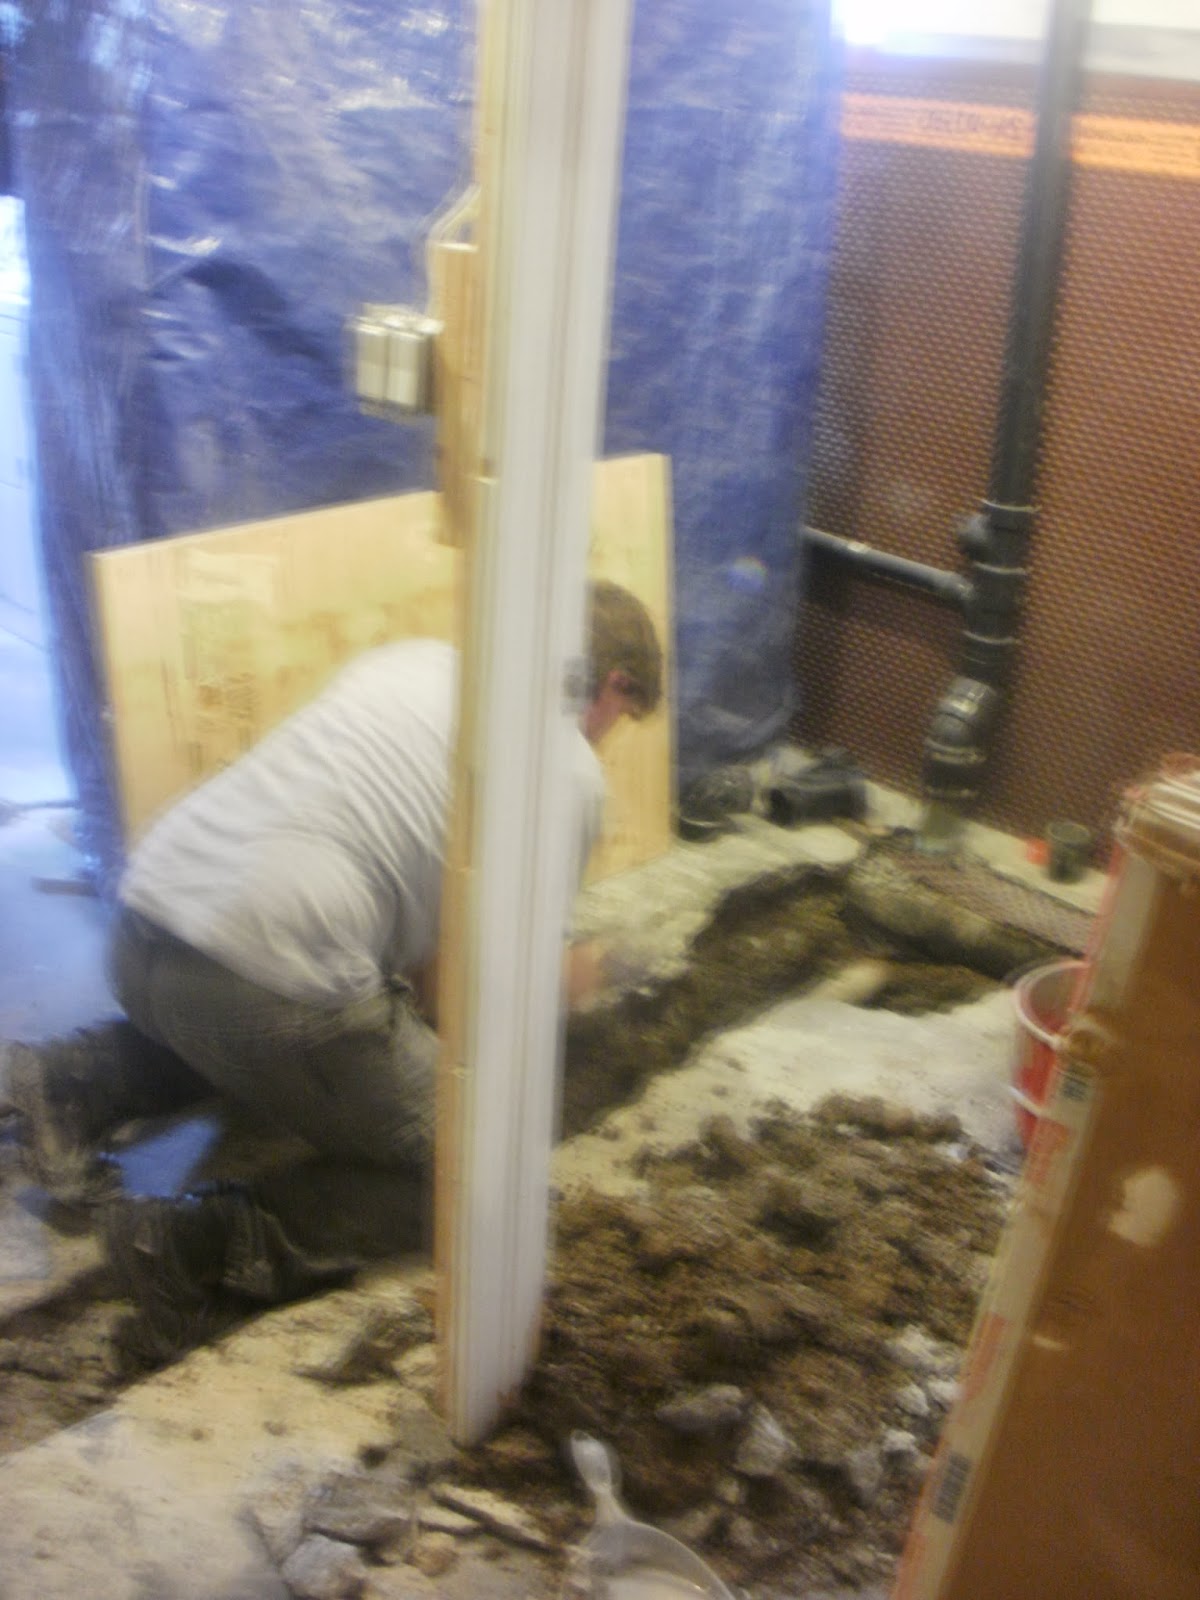
When we were finally ready to work on setting up our drain for the new tub (which ended up being in the opposite corner of the room), Henry, while working on the pipes, found that our sewer pipes were broken.  They were never installed properly and they had rotted and broke.  

Let me just say, for the record, that I am married to the most amazing man.  I was pretty much a basket case.  By this time, our basement had flooded AGAIN (thanks to a valve being installed wrong by our waterproofers) and now my house positively REEKED.  I wasn't much help, I'll tell you that much.  He worked and worked, was elbows deep in things you don't want to even imagine, and fixed the entire thing himself.  Dad Sluys talked him through some of it over the phone.  He deserves a medal, a prize, SOMETHING AWESOME.  He's a hero.

If you've a squeamish stomach, look away ;)  Here is where the break (clearly visible) was.  No worries...everything in these photos is just mud :)  But as you can imagine, it was pretty awful.  


 The entire thing had to be chiseled out with a jack hammer, so we(he) could see where the break was and how bad it was. 


On the phone with Dad Sluys in Chatham who really wished he could have come and helped Henry but was so helpful in walking him through things.


This was a BEAUTIFUL sight at 11pm that night.  And while it certainly wasn't our favorite experience, we realized what a blessing it was to have this breakage revealed us to BEFORE installing our new floor and new tub unit.  Phew.  We did have a plumber come out the next day to clean out the sewer lines all the way to the road with a special plumbing auger.  Turns out there was a roughly 95% blockage out by the property line that would've caused us big problems down the road.  So very thankful it's cleaned out and that was avoided!!  Moral of the story....have your sewer lines augered out regularly!!!


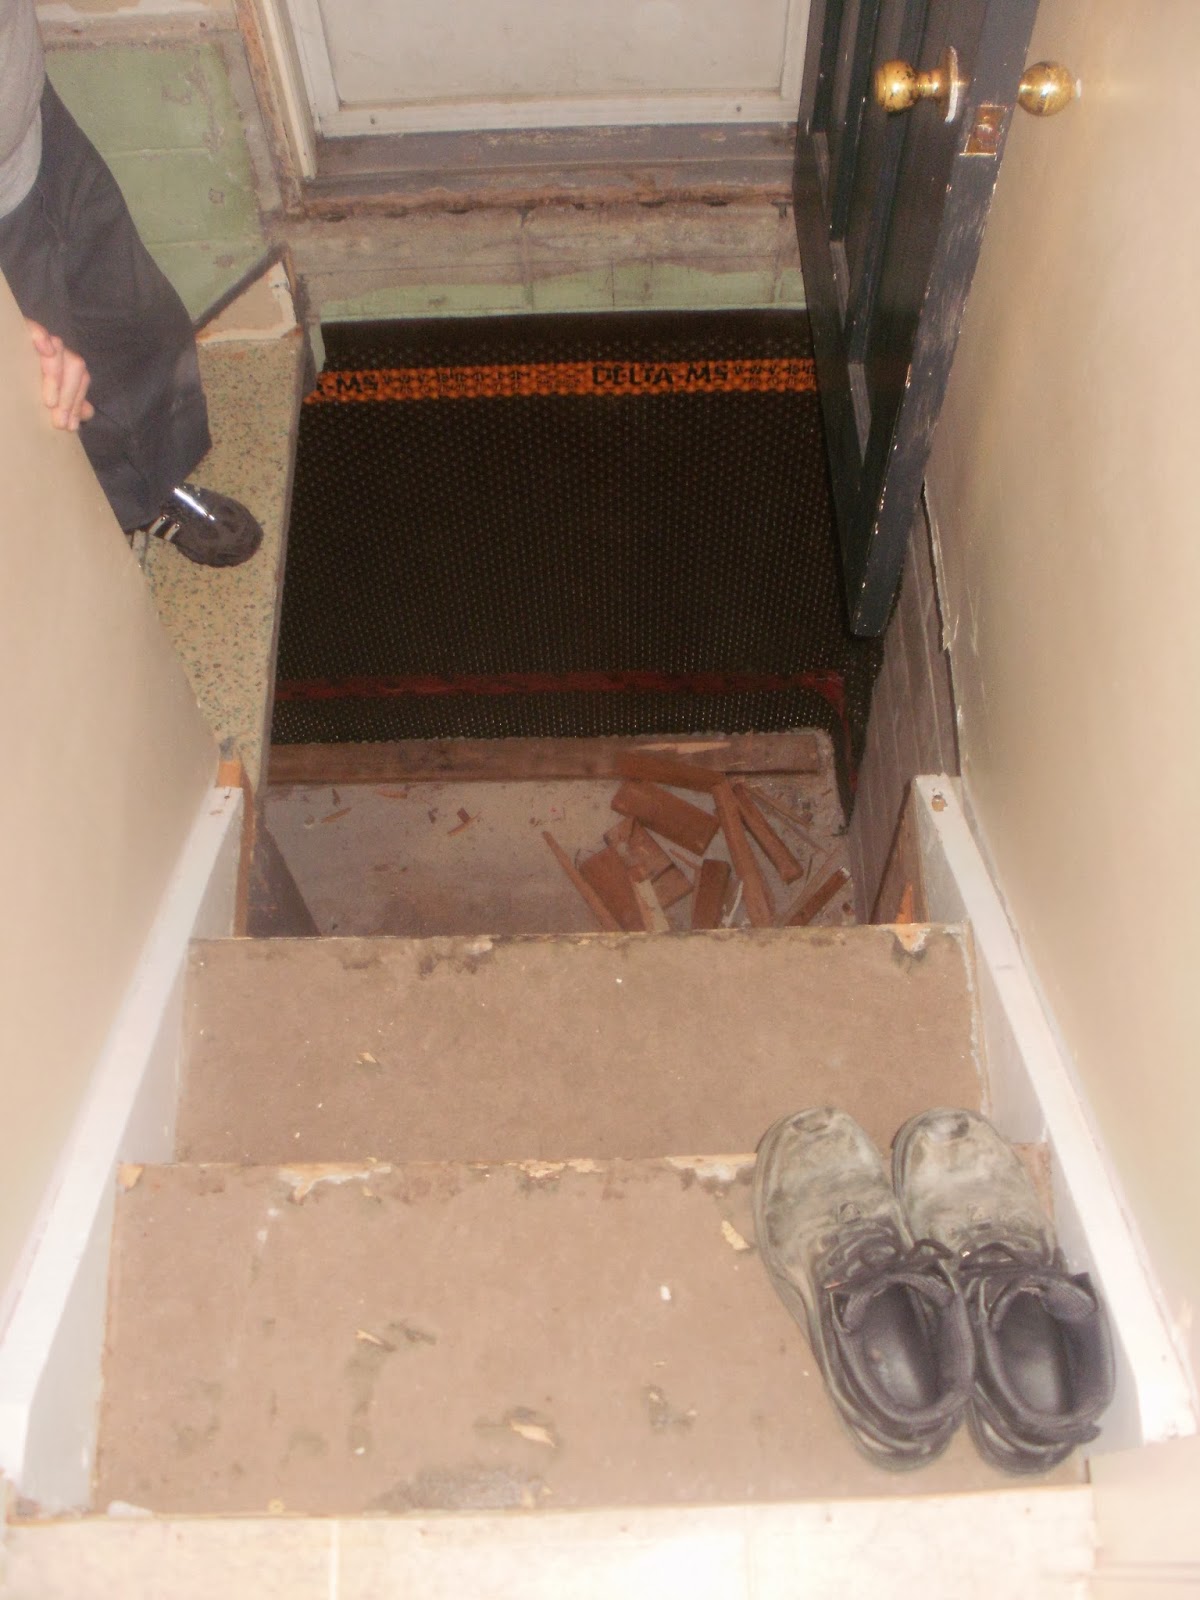
So, with the tub drain ready to go it was time for the tub :)  I had bought a brand new tub off Kijiji for a steal...$475 instead of $900 plus tax.  Yay for great deals.  Problem though...it was wider than the door opening.  I said to Henry "Well, can we just take the door off?  It needs to be replaced anyways".  Henry said "I suppose you could".  Then do it!  So, after rolling their (Henry and Dad Sluys) eyes (and secretly being thrilled at another "fun" project ;) ) they did.

Henry first removed the landing just inside the side entrance. Photo on the right is looking downstairs from outside.  Photo on the left is looking down from inside the kitchen. 


One of the issues we had to address was support for the new landing.  We've always had a beam that runs to the downstairs and was part of the wall that enclosed the stairs in the basement.  However, we wanted to turn that space into a book nook and didn't want a post sitting there.  Henry is an elevator mechanic and it just so happened that at the shop, was a "sling" they use in their lifts.  It was free for the taking (FREE!  We love free!) and so Henry installed it and it is what our landing sits on.  It's rated for 1200 pounds, so we think it'll be fine ;)  Dad finished by removing all the old door trim and frame.


This was done in mid fall and we were so thankful for the beautiful weather we had for this project!!  Of course, I had bought the wrong sized door (I now carry a tape measure in all my purses!), and so Mom and I headed out to Home Depot that morning to pick up the next size.


Then it came time for the tub.  This was exciting :)  We have some wonderful friends who showed up to help make sure the tub made it downstairs safely.


 And just like that, down she goes.


After the tub was in, over 75 sheets of drywall, bundles of insulation, plastic wrap, drywall compound, screws and tape were heaved down that hole.  Oldershaw's truck was loaded down.


After everything was unloaded and the men had had their coffee, Henry went to work installing the new landing and side entrance door, while Dad set to work building us a new stair case landing.  Previously it had simply gone straight down and there was very little room at the bottom.  He suggested putting a landing at the second step from the bottom and having the stairs "turn".  I'm so glad he did, because we LOVE it.  So, at the end of this very eventful day, we had a new side door...


 a new set of bottom stairs,


a tub sitting in it's rightful place, looking all wonderful,


and a basement family room that looked a little something like this....

  
Phew.  I think we cleaned up saw dust and debris until midnight that night :)